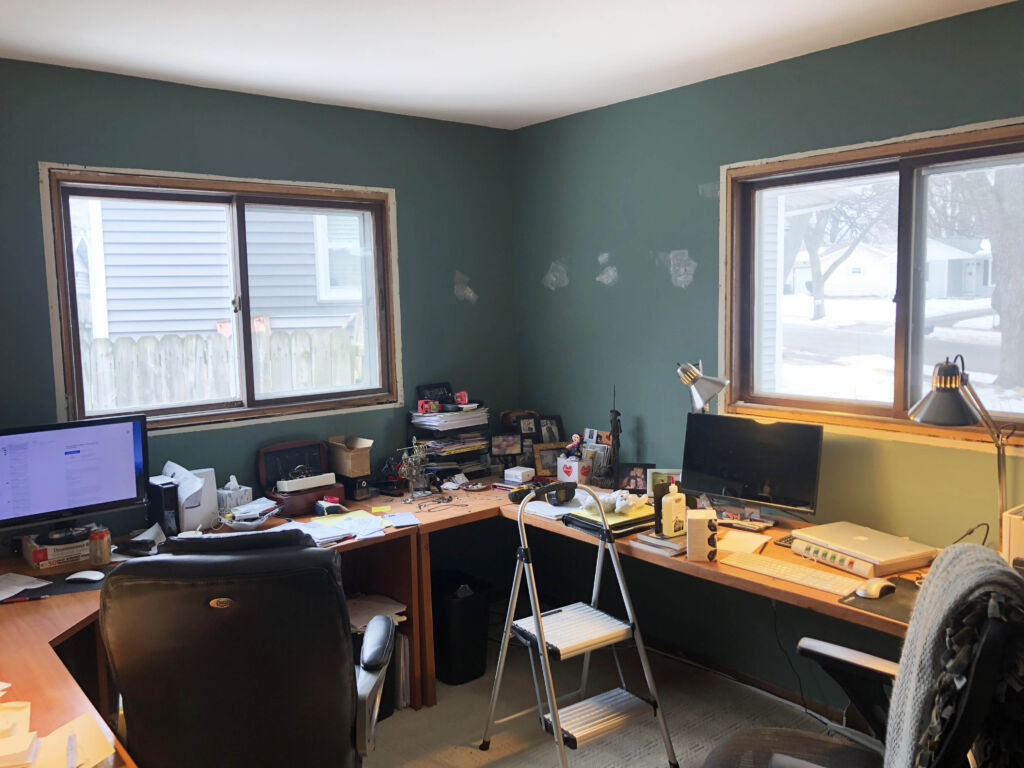
This project is an office remodel using ORG cabinets. A new job for Jennifer brought on the challenge of a complete, and much needed, office makeover. Our initial planning was based around using ORG cabinets sold by Dream House Dream Kitchens and using that focal point made the design and planning much easier. I wanted a storage option as well as an interesting top for books, plants, a lamp or a sculpture. This project had to be precise as I was given one month to complete the transformation, at least to the point of workability and comfort. The bulk of the project needed to make the office usable and the little details could be finished after the new job started.
For this project I had to consider a work from home challenge. The job requires video conferencing all during the work day so the look and feel of this office needed to impress colleagues and clients from around the nation and globally who are going to look into the background.
(On a side note, I always look into the background of a person’s home when they’re being interviewed on television. It’s my secret voyeuristic pleasure to see what books they read and what kind of art they have on their walls and the sculptures they possess, etc.
Phase 1 – Demo & Clean
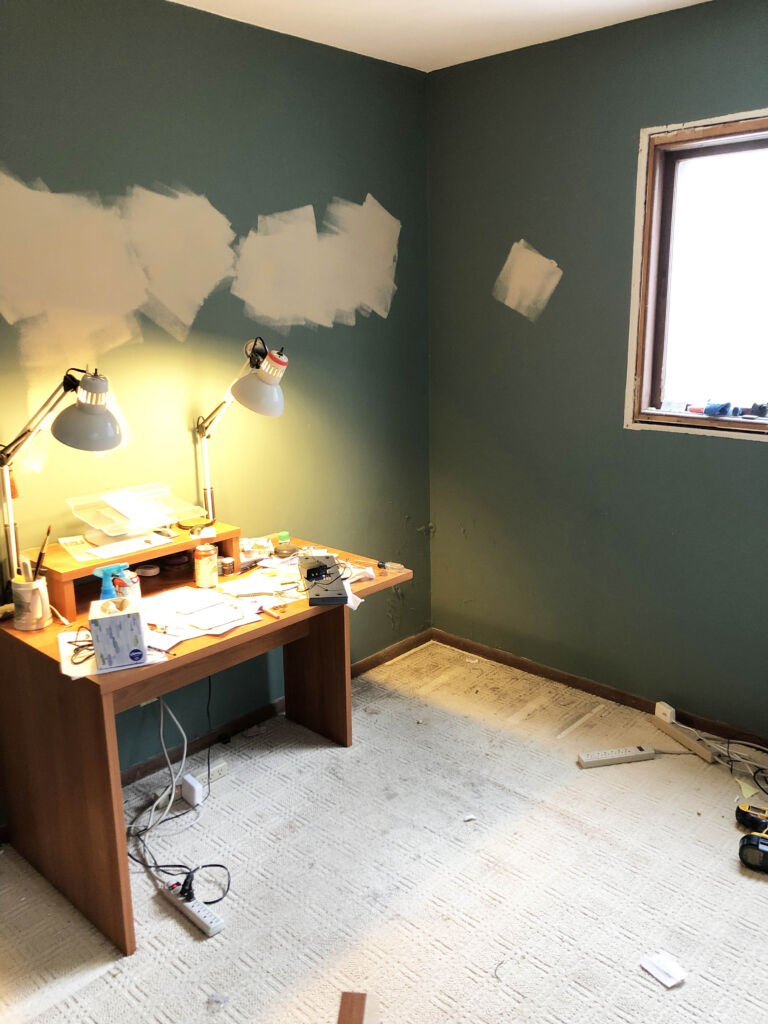
The first order of business was to gut and clean the entire room. I literally mean take everything out including the carpet and trim, doors and windows, old outlets and switches, etc. New wood flooring was going in and I had already picked it up and it was laying in the living room. Some time ago, I had built a makeshift desk behind the main desk to form a U shape so that two people could simultaneously work. I built this ugly thing during the pandemic to accommodate two people. It was a temporary solution that lasted far too long, unfortunately. I tore it apart and took the other L shaped corner desk apart as well. This desk needed to be saved and reused as it’s perfect for the room and the needs of the future sole occupier of the office.
I cut the carpet out and took up the pad and carpet tacking strips as well as pulling out all the staples. Then I repaired every portion of the floor that squeaked when you walked on it. Now that the floor was bare and the trim removed it was time to paint. It’s very easy to paint an empty room.
Phase 2 – Paint, and lots of it.
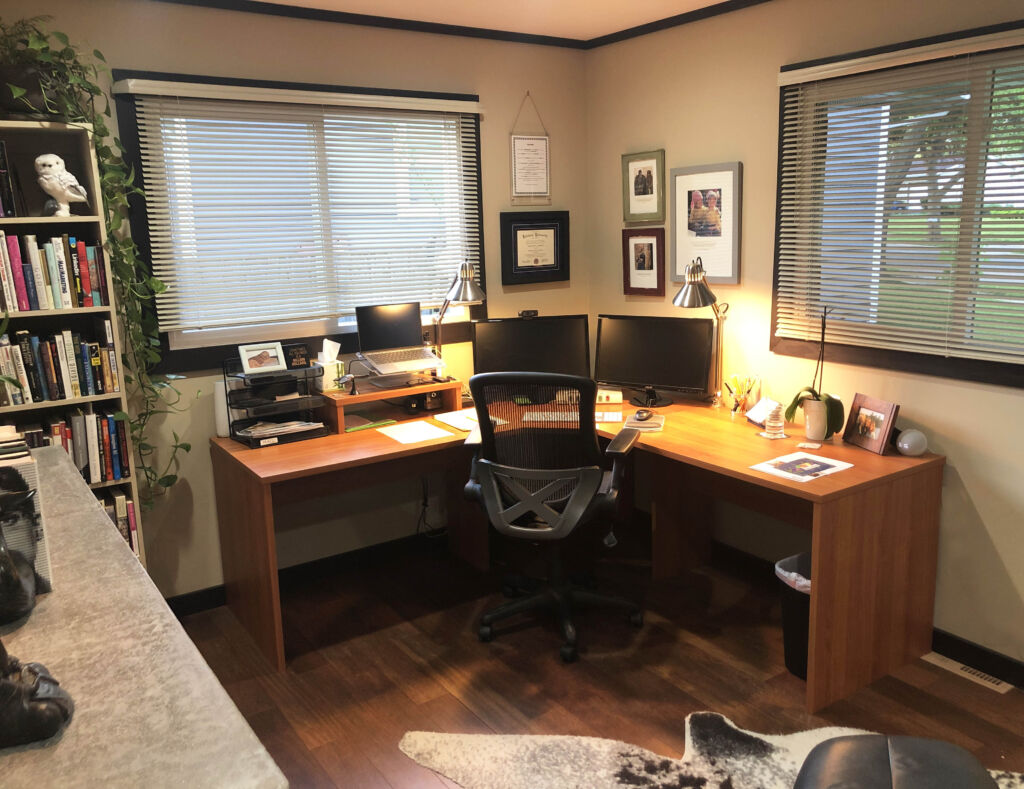
The old office had a dark sea green paint color on the walls that Jennifer and I wondered how this color was chosen. It was awful and neither one of us wanted to take the blame for the color so we had fun blaming each other for having seriously bad taste! So off to Hallman Lindsay I went to purchase two gallons of Shaker Beige paint which is a soft light beige color and about as neutral as you can get. Plus, this color is the same color as the rest of the upper level. I love the color as it’s great for showing off artwork. It took four coats to cover that ugly green “Jennifer picked out.” Ugh! What was she thinking when she picked that color? Gross. Work lights were brought in and the walls were done and the empty room looks beautiful.
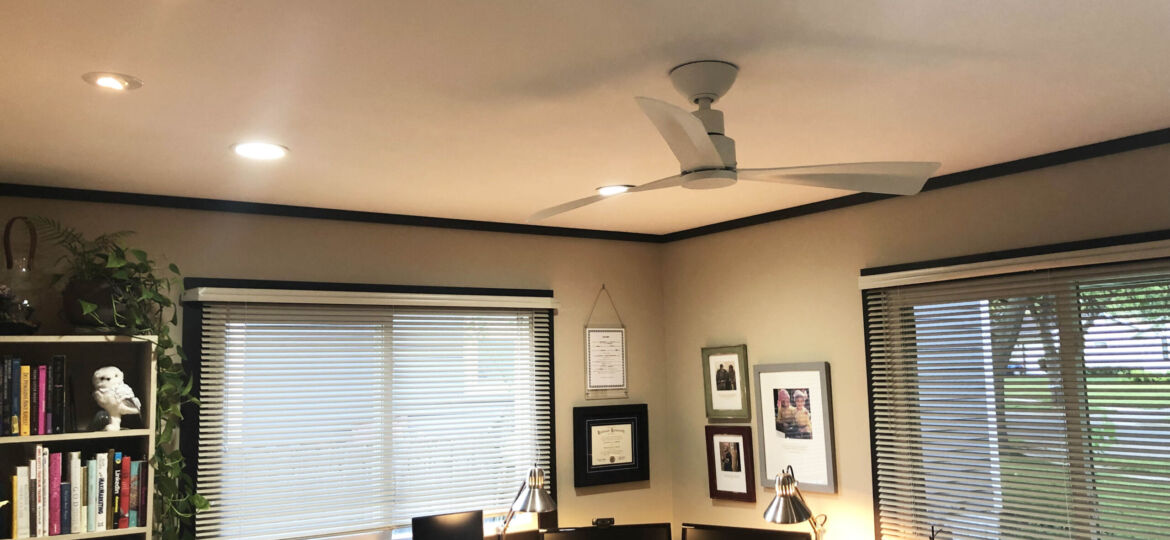
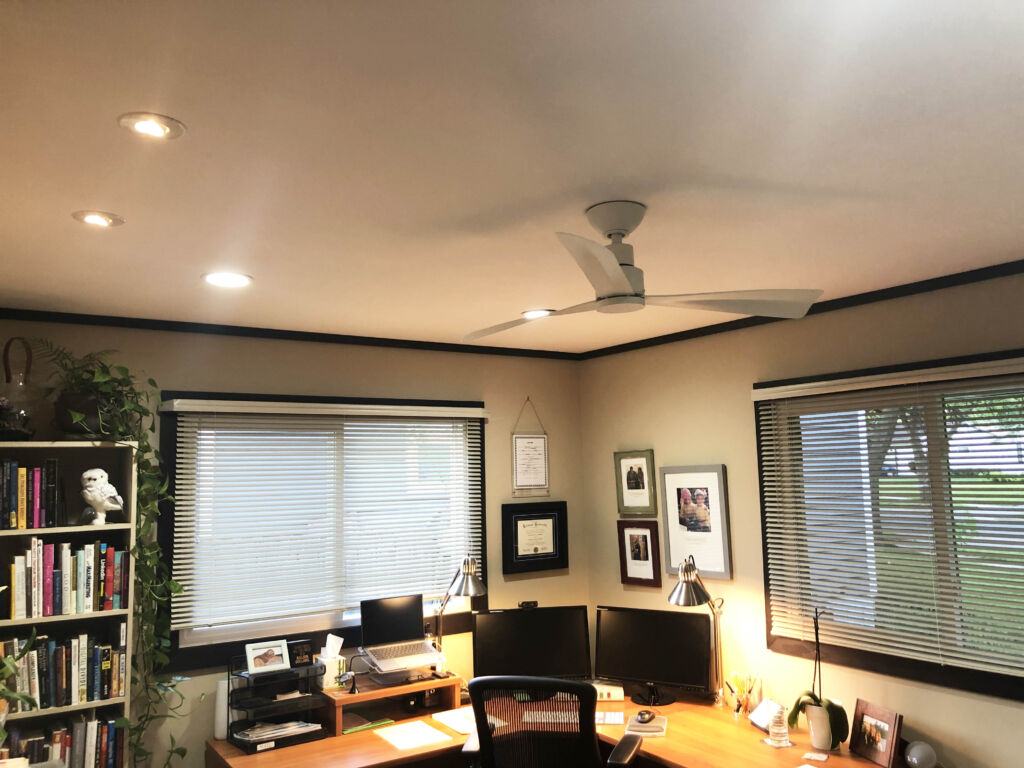
I also bought a gallon of ceiling white from Hallman Lindsay as everything was getting a makeover. I took out the center ceiling light and will replace the light with a beautiful white remote control Minka Air ceiling fan. We have a bigger version of this fan in the bedroom and it’s AMAZING. When the ceiling was done I installed the fan.
Phase 3 – The NEW FLOOR!
Installing a wood floor is not too difficult but it is time consuming and you will get a workout if you’re installing it by yourself. I rented a floor nailer and was up down up down up down all day long and after two days, I was done. The office is only 130 square feet but my legs, knees, and back were angry with me for a couple of days after that. I got lucky and had one small piece of floor left over. I should say I got very lucky as I was sweating it out as I got near the end. Having to buy another full box of flooring for one small board would have been terrible.
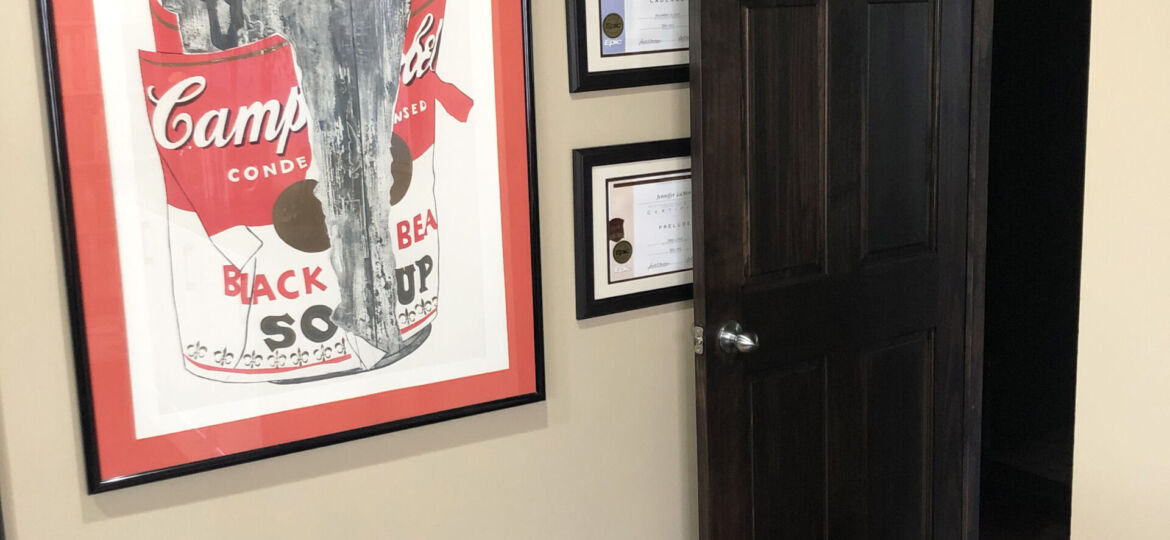
We chose Brazilian Chestnut as it matches the floor in the upper level. Once the floor was in I added new 4” floor trim and 2” ceiling trim and stained them with Kona color oil based stain. The color looks black but it’s more of a deep dark coffee color and it’s a beautiful rich look. The dark ceiling trim completely changed the look of the room.
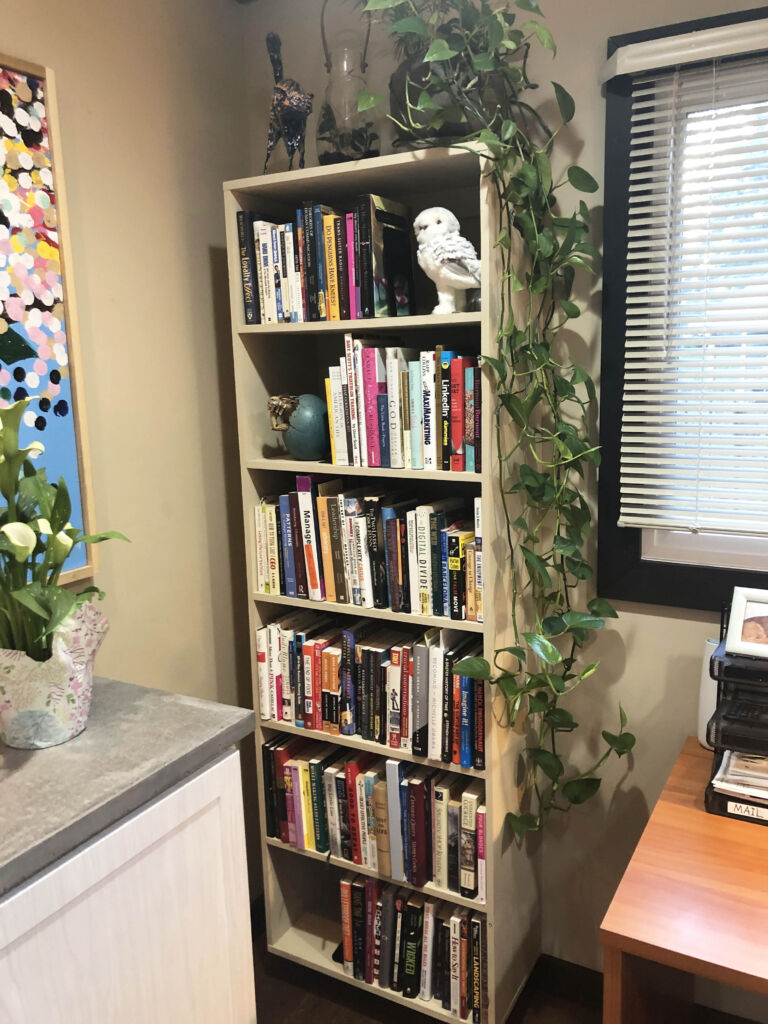
I then built a new bookshelf that is mounted to the wall to the left of the desk and it appears to float on the wall. I painted it the same color as the walls to give it a built in look. All the screws are hidden even though all the books would have covered up any visible screws. I didn’t think of that when I built it. Oh well.
The new windows I ordered from Menard’s arrived and I installed them and trimmed them out with the 4” trim with the Kona colored stain. WOW … What a difference new windows make in room built in 1964. Plus, they silence the room. When they’re closed you can barely hear any street noise.
Once the paint and the new floor, windows, and bookshelf were in it was time to assemble the desk and start to put the office back together. I’m on week three at this point.
On a second side note – I ran 14-2 electric wire underneath the floor from the basement to come up under the desk. The purpose was to add new outlets to power the computer system, modem, and wireless Internet Mesh unit so that these devices can operate on their own breaker. I then hooked the wire to the electric panel in the laundry room. It was easy to do but copper wire is unbelievably expensive these days.
Phase 4 – Lighting Is Everything
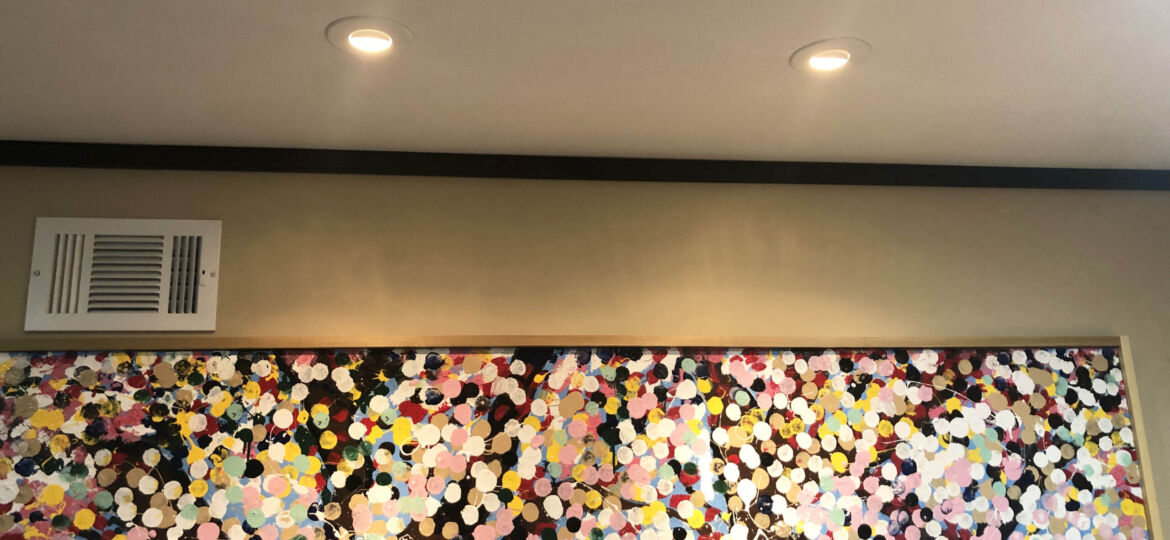
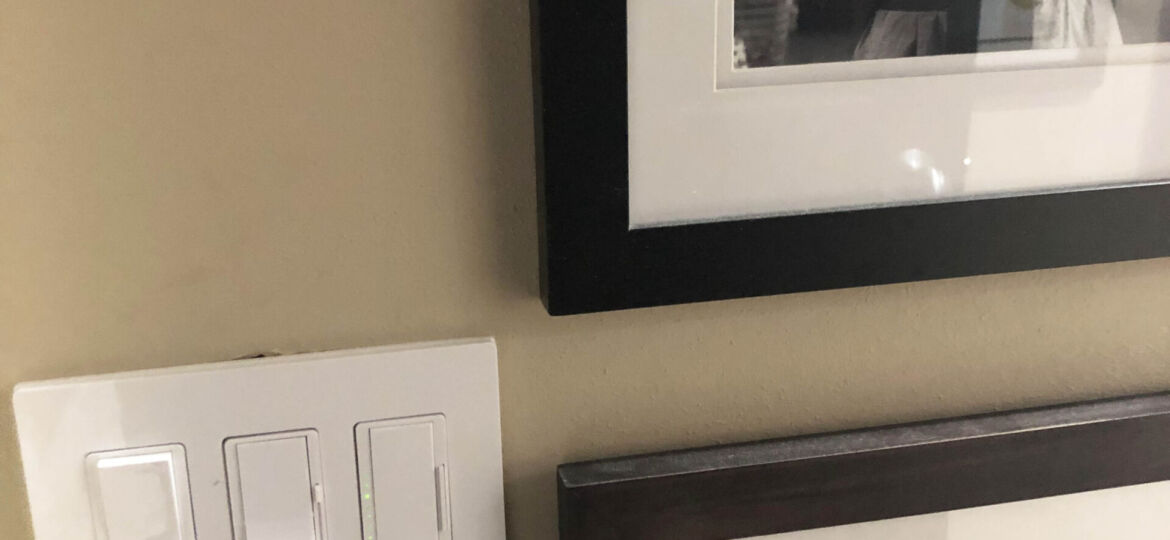
I’ve learned over the years that lighting is everything in a room. Inside. Outside. It doesn’t matter. When a room or an outside living area is lit well, you notice how beautiful it is. When it’s poorly lit you notice that, too. With the desk assembled and put in place I was able to determine where the ceiling lights should go and new recessed lighting was ordered and arrived the next day. (Amazon is a beautiful thing) New Lutron dimmer switches were added and natural colored LED lights were installed in four recessed ceiling lights strategically placed in the room. I also installed the lights to illuminate the painting.
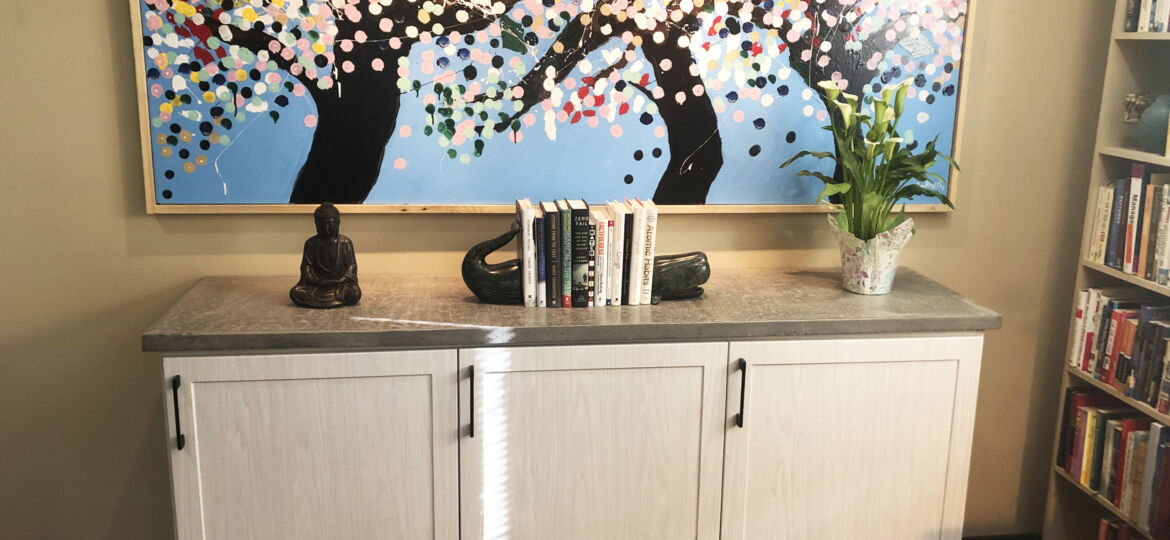
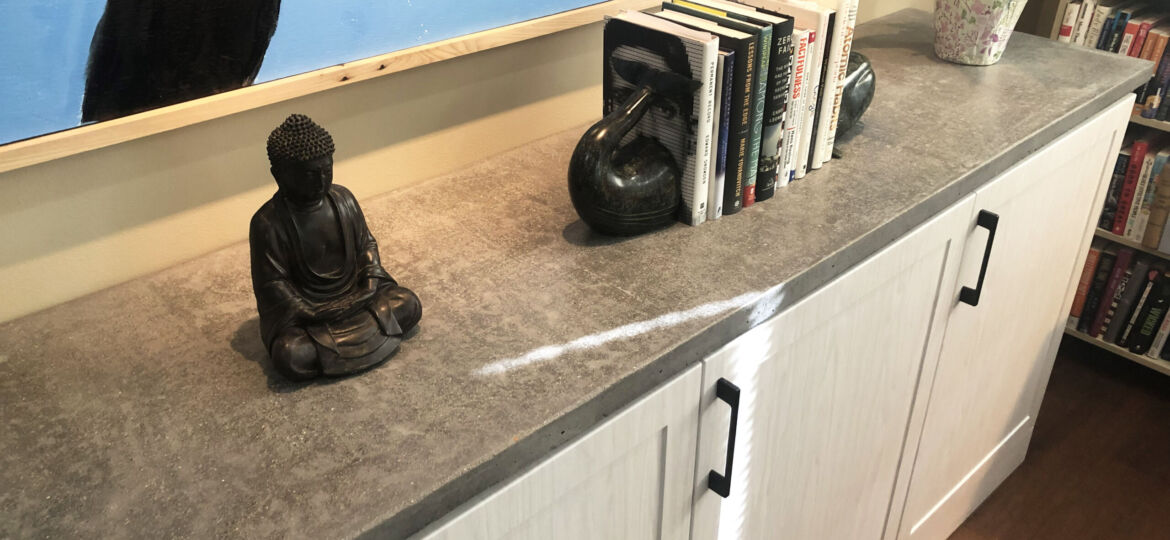
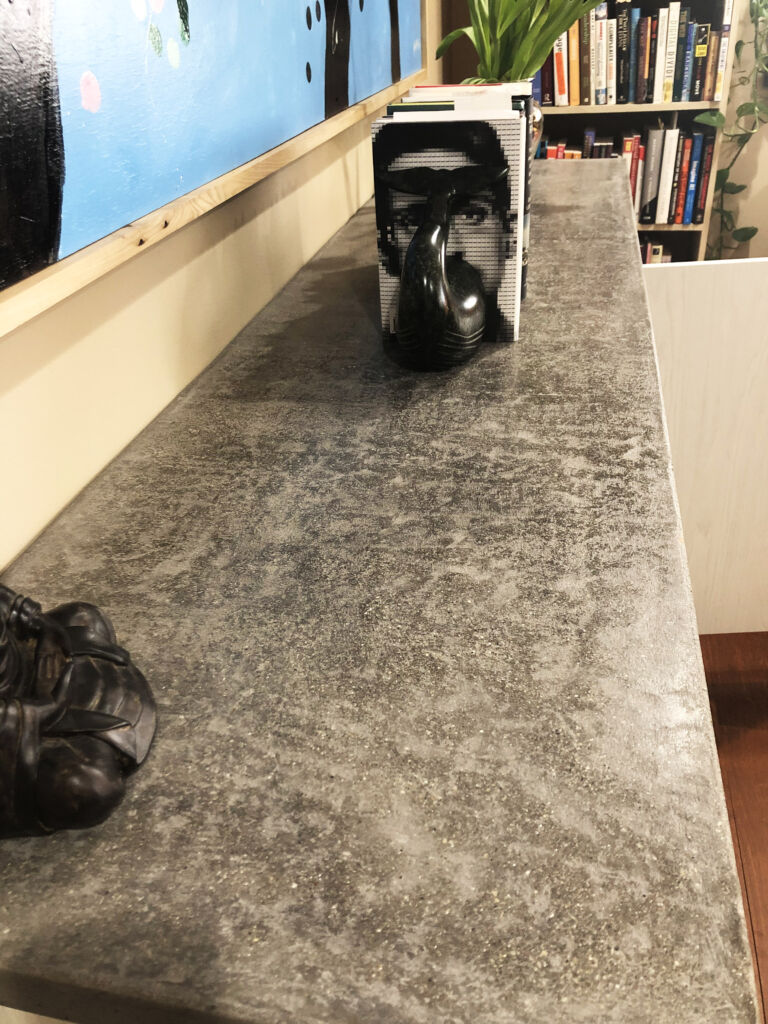
I hung my new painting on the big wall and the recessed lights brighten all the colors perfectly. These lights are also on a dimmer and the soft glow enhances the colors. I then called Dream House Dream Kitchens and made an appointment to order three office cabinets that would go under the big picture. My plan was to make a cement countertop to sit on top of the cabinets. Once I received the cabinet dimensions I built the frame and poured the cement.
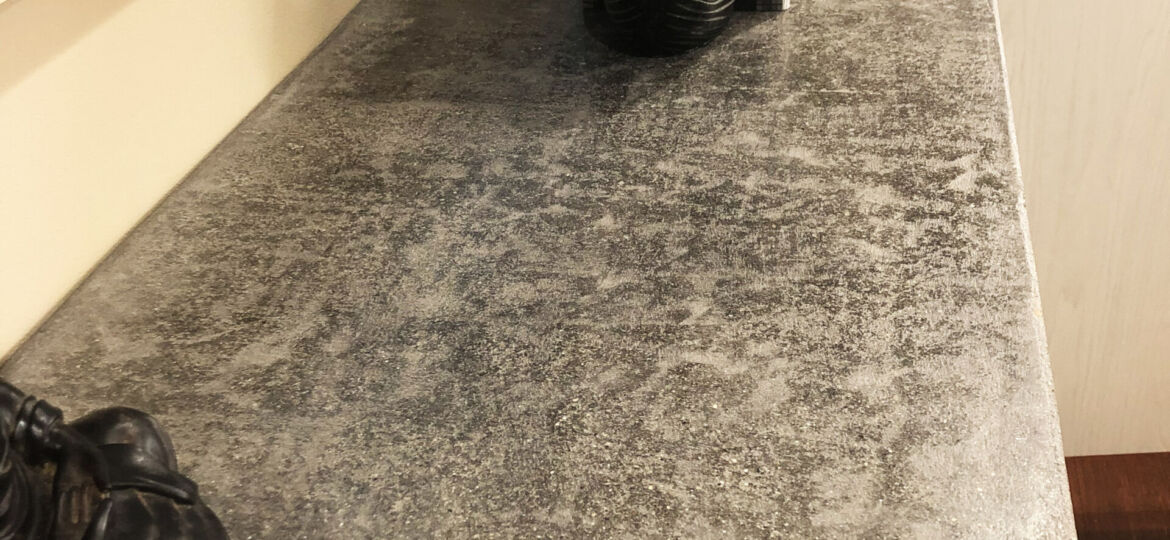
When making a cement countertop there are several things to consider and I wanted a polished top that was stained a dark gray to contrast the off white cabinets. After the cement cured, I ground down any imperfections, sealed, and waxed it for use. IT IS STUNNING to look and very smooth to the touch. What I love about our cement top is the color variations and the small rock imperfections that you can see but when you glide your hand over the top, it’s just like glass.
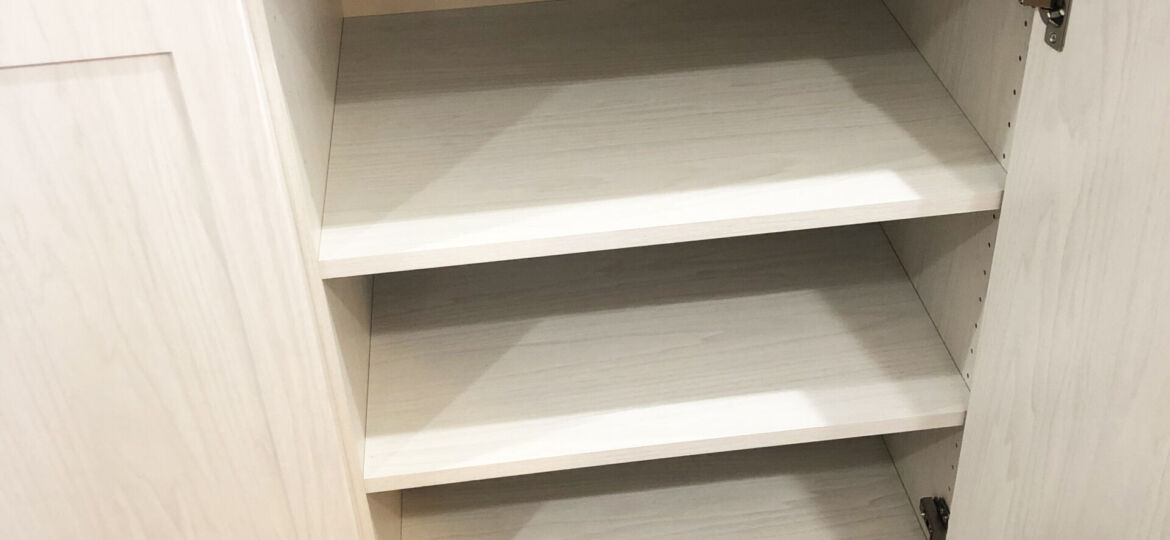
Chris Schmidt ordered the cabinets for me and when they were installed I was blown away. Wow …. Quality with a high-end feel. Sturdy construction and beautiful to look at. The soft close doors are wonderful and silent as they gently close shut. The cement top is perfect and the contrast against the white cabinet is what I wanted. We did not want a traditional metal file cabinet and preferred a “fancier” option to store office supplies as well as our own personal paperwork. These beautiful cabinets are from ORG Home and were a much better choice than buying something cheaper. If you like the look, contact Chris Schmidt at the Dream House Dream Kitchens Middleton showroom to order yours. They have dozens of color options and features to choose from. We could not be happier with this choice.
Phase 5 – Decorate
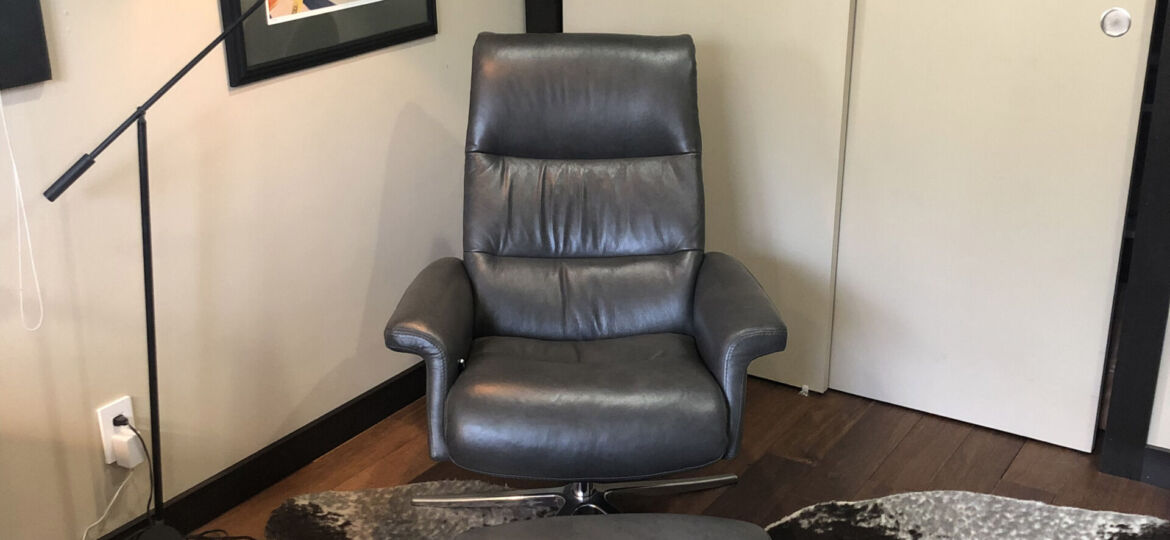
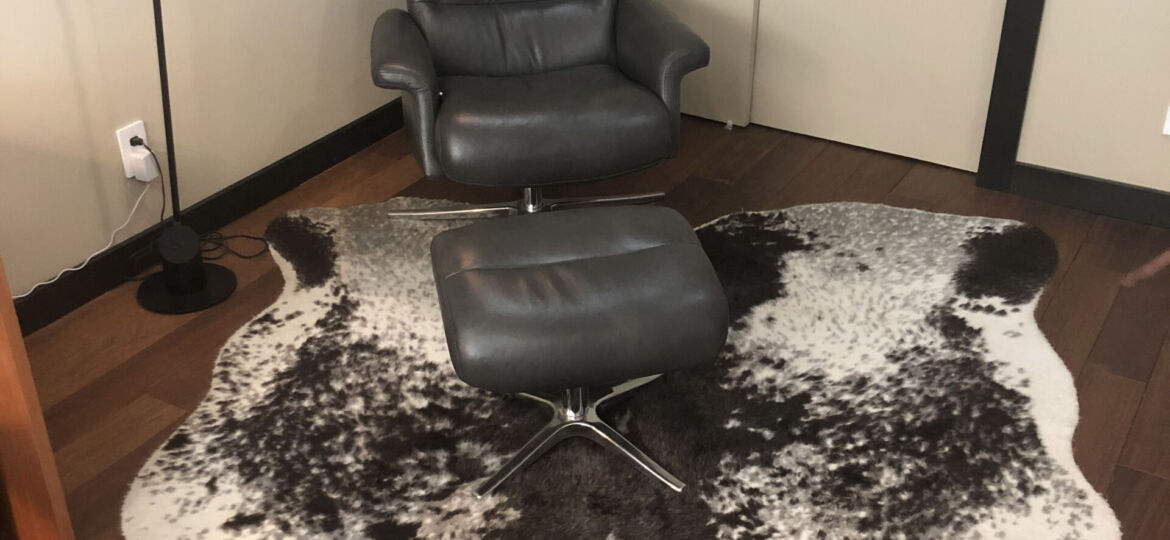
Now the fun part! After six weeks we are at the end and it was time to decorate. We went to Rubins and found a beautiful and super comfortable leather chair and ottoman that fit perfectly in the office. We wanted an animal print rug and found a faux cow skin at Rubins that is soft and wonderful. The office looks fantastic. If you need to work from home this is the office to work in.
I painted the tree and dot leaf painting on a wood panel and mounted it to the wall using baton strips. I framed the painting with a hardwood and sealed it but left the color natural. I thought staining it black would have been too much and leaving the color natural brings out the bright colors of the painting. The painting was a surprise for Jennifer and it took me four days to paint it. Jennifer was visiting friends in Texas and didn’t know I was doing this so it was a gamble hoping she would like it when she got home. She loves it and it’s a beautiful look in her office.
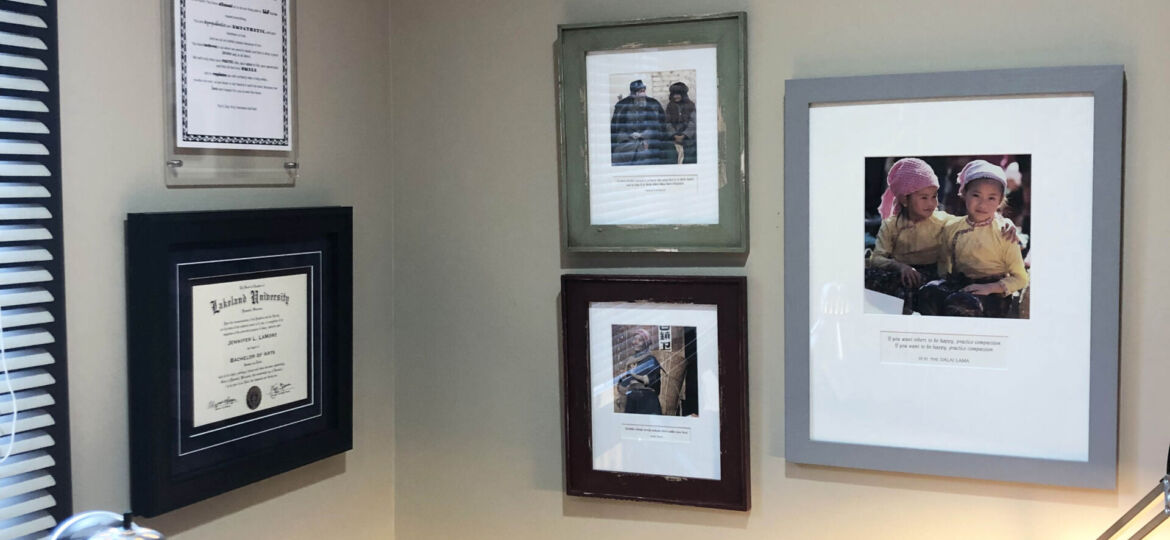
We have collected art pieces from Art Fair On The Square over the years to display in her office at her previous job and I hung all the pictures and put the sculptures in place. When she returned from Texas, the office was done. It took me six weeks instead of four only because I had to wait for some of the things I ordered which is now the new normal after the pandemic. As another treat for Jennifer I ordered her an Alexa Echo Dot and this little gadget is amazing. Everyday she turns on Spotify and can listen to hours of soft music while she works in between meetings. The old office used to be a place we spent as little time in as possible and now it’s a room we sit in and enjoy all the time.
Cost
I can tell you that the cost of this remodel would have been considerably more expensive if I had to hire the job out. But even with completing the job myself the cost was over $7,000. When I add it all up the floor, cabinets and the leather chair and ottoman were the most expensive. The doors added to the cost as well. The ceiling fan was $400+ and even the three gallons of paint and supplies were north of $100. The faux cow rug was $300. The beautiful trim on the floor, ceiling, and around the doors (including the closet doors) and windows added much more costs than I expected not to mention the oil based stain. I painted the closet doors the same color as the walls and trimmed them out in Kona colored stain. I love the look. The pine wood shelf I built was not expensive but was over $100. But, that cost was worth it. The new windows were $700 combined but we needed new windows regardless of the remodel. The ceiling lights and wire were expensive as well and, LED light bulbs have substantially risen in price. However, they will last 20 years. I forgot to mention that I added additional insulation in the attic above the office because it needed it.
We went over the top on fun extras because it was time for a complete remodel of the room and even though we “probably” didn’t need an expensive leather chair or even new doors. The room looks fantastic and Jennifer loves it and that’s all that matters.
The big painting was expensive to paint and frame the way I did but look at it …. It’s a great addition to the office.
Enjoy!